Author Topic: PROJECT VENUS  (Read 8087 times)

Offline warzoneD

  • Member Emeritus
  • *****
  • Posts: 1206
  • Karma: +73/-0
  • Ad Astra Per Aspera
PROJECT VENUS
« on: August 25, 2008, 12:37:31 AM »
I wanted to create a modular terrain board that simulated Venesian Jungles/Swamps, badlands--

So I got some MDF, cut it into 2x2 sqrs, and mounted it on frames of 1x4's to stop the boards from warping and to give them weight when playing.

I made 6 squares all of which could be arranged side by side and rotated differently thus create a diff. board (up to 4x6) everytime we played.

4 of the 6 are completed--- Here are the first pics (As always, I'm using the disclaimer that because I'm such an asstastic photographer, the stuff looks much better in real life.)--


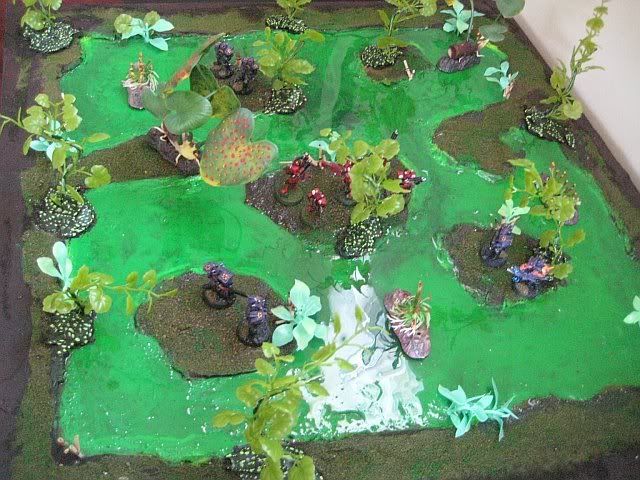
Board 1: The Marsh of Madness - Paint, spackle, flocking, resin, wires, Aquarium decor (these are movable pieces that let me vary the board's layout), and natural reeds from my garden


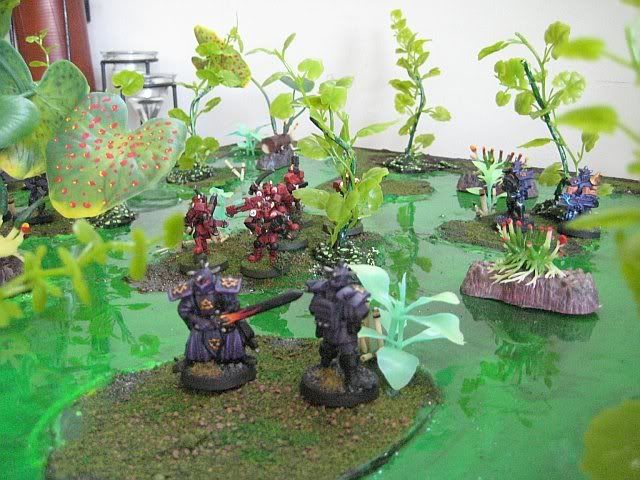
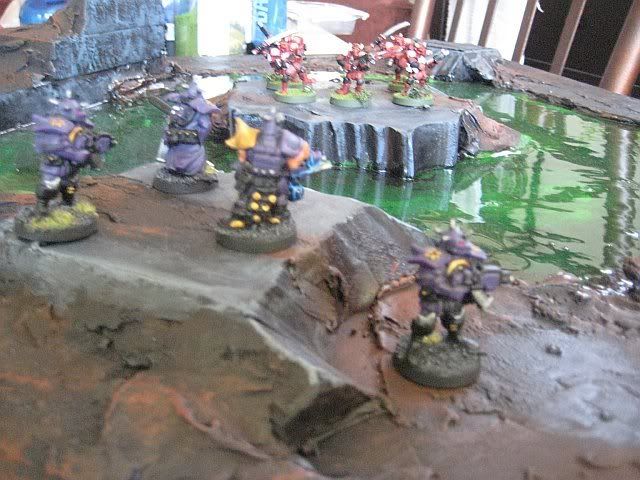
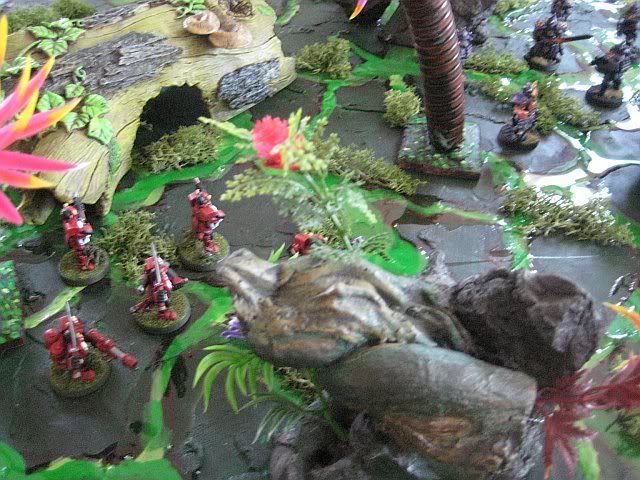
A patrol of Crimson Devils find themselves surrounded


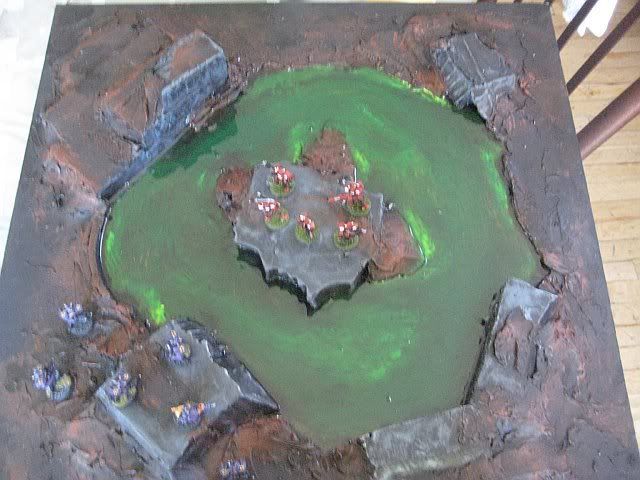
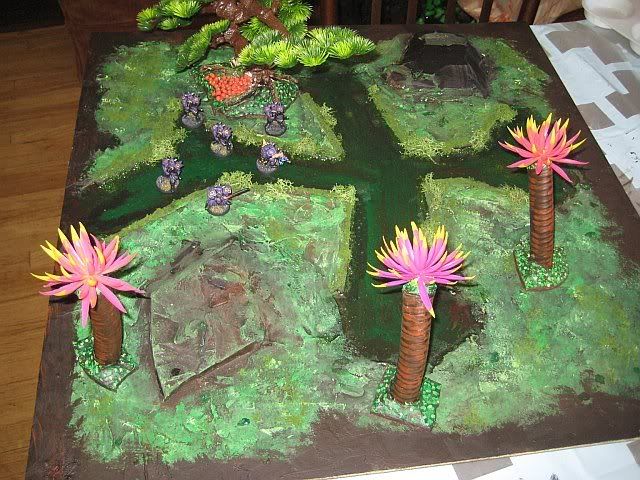
Board 2: The Goo Pool - Paint, foam, spackle, resin


Helloooooo!


I'm crushing your head!


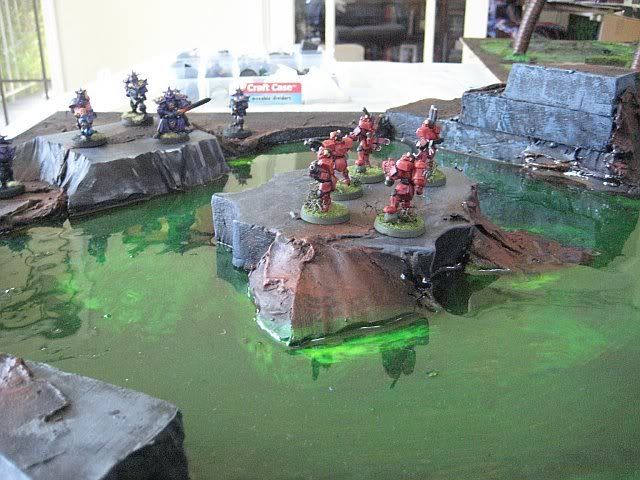
Board 3: The liquid crossroads - Paint, Resin, Spackle, Foam, Flocking, Aquarium Decor (these are movable pieces that let me vary the board's layout), and natural reeds from my garden


My what large fungal growths you have.


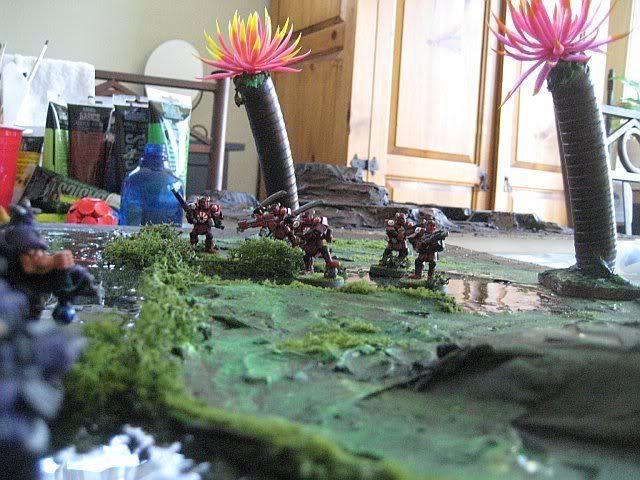
The trees are cable, cut and painted, with decor for the palms (mobile).


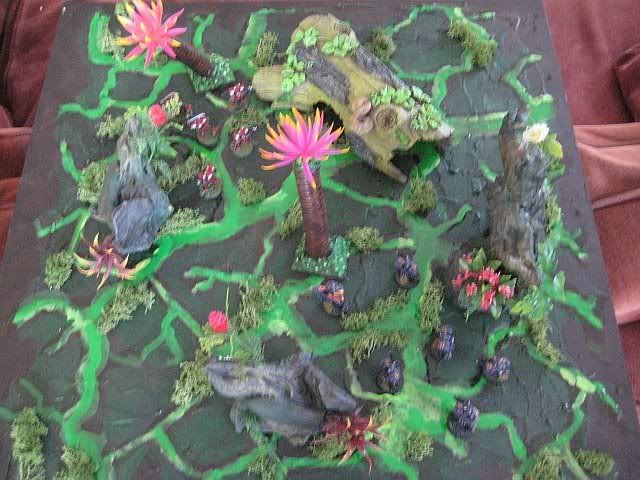
Board 4: The 100 canals - Paint, Flocking, Resin, Aquarium Decor (these are movable pieces that let me vary the board's layout)


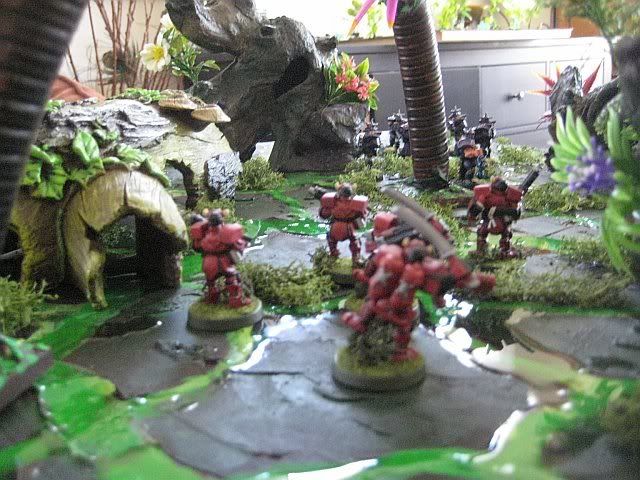
Ill met in the jungle


Danger ahead!


2 More to come as soon as I finish them--

D
« Last Edit: August 26, 2008, 11:53:16 PM by warzoneD »

Offline Nighthawk

  • Full Member
  • **
  • Posts: 236
  • Karma: +12/-0
Re: PROJECT VENUS
« Reply #1 on: August 25, 2008, 02:48:37 AM »
WHOA! Someone's been busy at work! Looks awesome man! :D

Offline Coil

  • Board Member- First Crusader
  • Administrator
  • Member Emeritus
  • *****
  • Posts: 1228
  • Karma: +88/-1
Re: PROJECT VENUS
« Reply #2 on: August 25, 2008, 02:54:07 AM »
Looks good so far. I'd like to see a pic of them together.

My favourite is the goo pool.

Offline Dr. Nick

  • Member Emeritus
  • *****
  • Posts: 1054
  • Karma: +48/-16
Re: PROJECT VENUS
« Reply #3 on: August 25, 2008, 04:33:49 AM »
 :) :D ;D :o

but you knew that...
"Donīt anticipate outcome. Await the unfolding of events. Remain in the moment."

Offline luckyone

  • Member Emeritus
  • *****
  • Posts: 2249
  • Karma: +40/-0
Re: PROJECT VENUS
« Reply #4 on: August 25, 2008, 06:00:40 AM »
Wow dude. Just WOW!
Always look out for number one, but don't step in number two.
What do you mean Flash Gordon approaching? OPEN FIRE!
The entire Capitol Army.
Don't ever say anything but a 20 before rolling the dice.

Offline DogOWar

  • Member Emeritus
  • *****
  • Posts: 1156
  • Karma: +35/-0
Re: PROJECT VENUS
« Reply #5 on: August 25, 2008, 08:42:42 AM »
Really incredable work there.  Great job.
Its not the dog in the fight, its the fight in the dog!

ebay "handle": irishdog143

Offline MadBrad

  • Member Emeritus
  • *****
  • Posts: 1128
  • Karma: +52/-0
Re: PROJECT VENUS
« Reply #6 on: August 25, 2008, 09:41:22 AM »
What did you use for the water details on the boards?

The whole setup looks really good. 

Cybertronic - Superior by design

E-Bay Handle: bradthemad

Offline warzoneD

  • Member Emeritus
  • *****
  • Posts: 1206
  • Karma: +73/-0
  • Ad Astra Per Aspera
Re: PROJECT VENUS
« Reply #7 on: August 25, 2008, 12:31:02 PM »
Thanks all--

The whole project took about a week and was a lot of fun to evolve.  The best part was mixing mediums, like the palm trees or the Bonsai tree -- WIth this, the  base is MDF, a mound of spackle, which I then painted, glued on styrofoam packing balls, then painted red and orange to be fungus, the tree roots I painted and dipped in flcoking to make it look like moss, and lastly I used dried reeds from the garden to look like random swampy plants.

@MadBrad
The water is the most fun.  It's really surprisingly easy to do.  It's a two part casting resin sold at most art supply stores (there are 2 kinds, one is measured in equal parts - the other uses a catalyst in a much lesser proportion - I prefer the former.).

It does have some odor so work in a ventilated place.  The odor fades after about 6-8 hours, sometimes sooner.    BTW - this resin can be used to great mud effects, waterfalls, ice, I even used it on my Merc Maculator to give it that, "risen from the water" feel.

I've experimented with several different techniques--  you can add paint to the resin to color it (But I don't love the result), the one I prefer is to paint the board, and pour the clear resin over it.  You can also do several layers to give more depth.  I used this stuff to do my rivers - it's very cool looking.

Another word of advice, if you're going to do any flocking, do that BEFORE you lay your resin.  Also, dulling sprays and finishers KILL the resin's gloss, so make sure you do those coats BEFORE you pour the resin as well. 

Essentially it shouild be among the last things you do. 

On a final note, I recommend wearing latex gloves the first few times you work, and working on a stainable surface (not your nice new kitchen table) because this stuff is VERY gooey and hard to get off.

I have more water stuff on my forest board (which I call Venus-Nam) and the Cave & Pond Board which are next up--

D
« Last Edit: August 25, 2008, 03:18:56 PM by warzoneD »